• Gary Winogrand’s Refrigerator

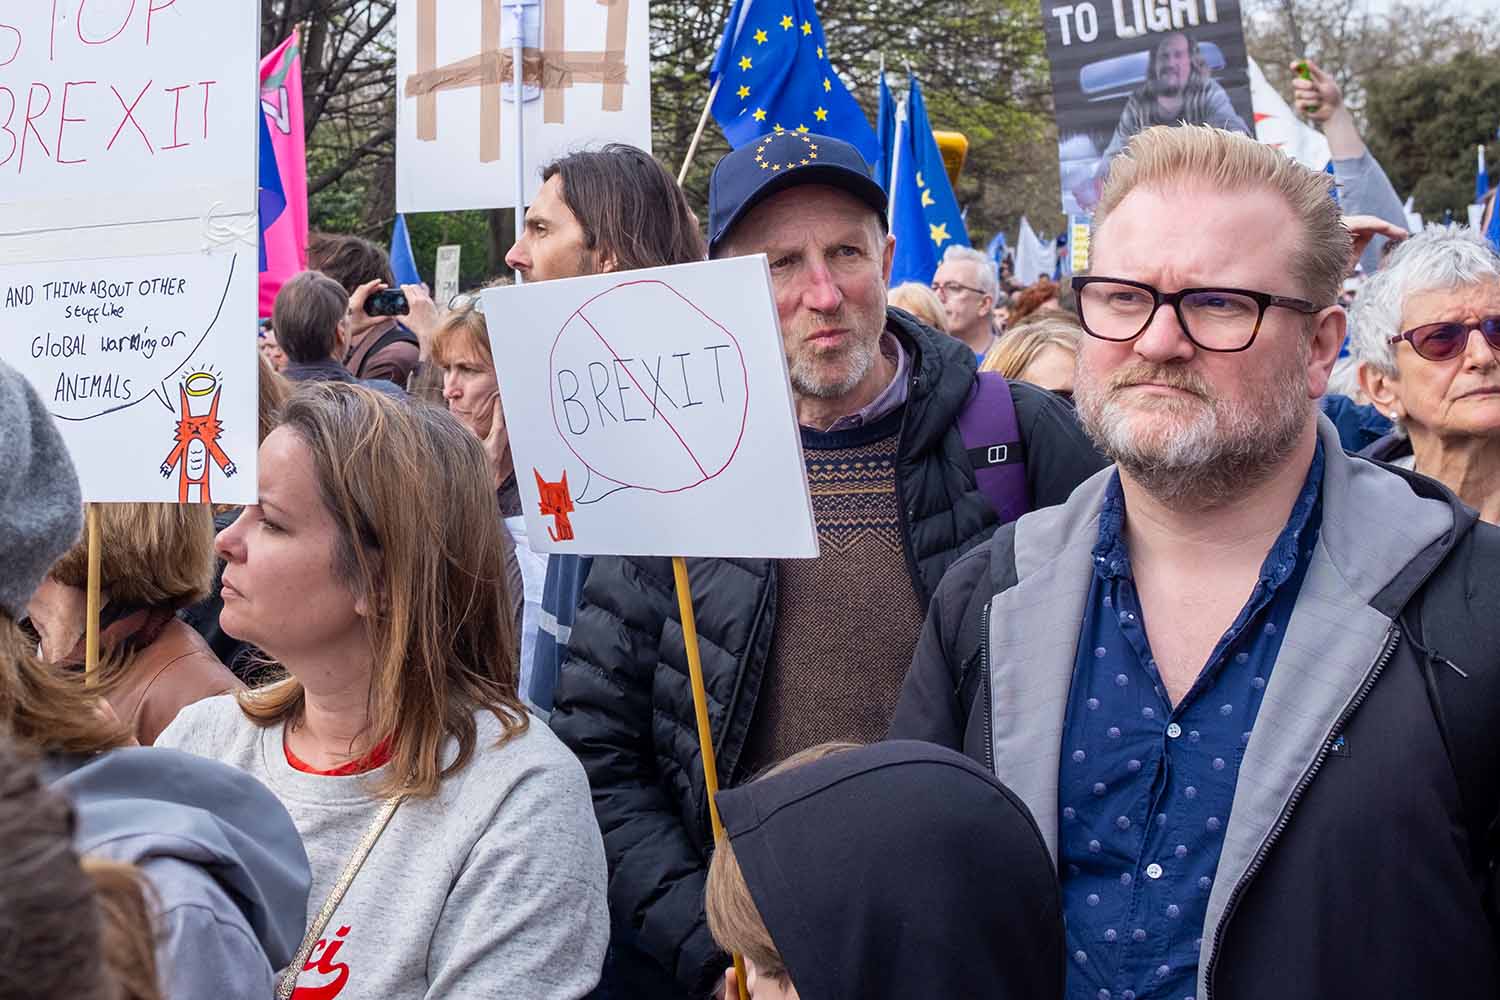
    This evening I came across this photo that I took a few years ago on the march against Brexit.

    I can see it as though someone else photographed it. I am guessing that I concentrated on the couple because they looked serious and involved and together.
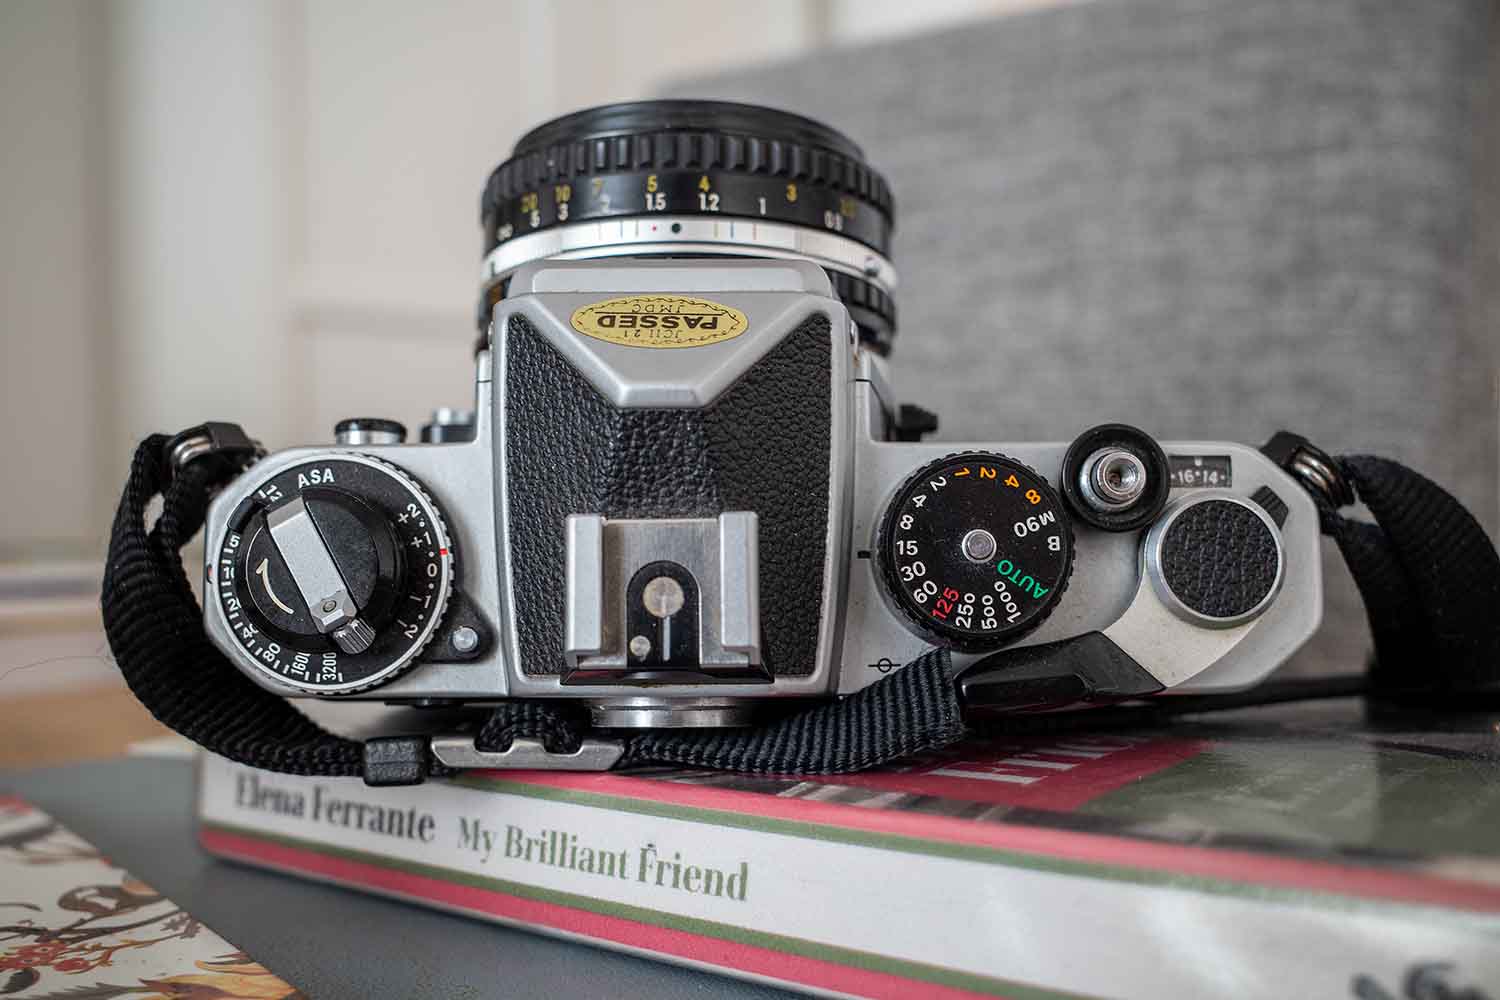
    In The Days Of Film

    It was kind of easier in the days of film to remove oneself from the event because there was always a delay between shooting and seeing a print.

    If you developed and printed yourself rather than send film to a lab then the exposed film could sit around for a while.

    You would also have unexposed film lying around for a while as well because film was your consumable and you didn’t want to run out.

    Tamara asked me a couple of days ago how Lee Miller got hold of the film she shot when she was a war photographer.

    I guess she took a couple of hundred rolls of 120 with her. Maybe she could get film along the way – after all, there was a war on and towns were being overrun.

    That question answered itself when we learned at the exhibition of her work that at one point she commandeered an abandoned film shop in a town (in France, I think it was) and developed and printed her work there.

    Perhaps she also stocked up on more film.

    Getting Film and Keeping Film

    It’s easy to say that it’s a good idea to keep unexposed film in the rolls in the canister to keep humidity out.

    And it’s easy to say that one should keep the canisters upright to minimise contact between the layers on the roll. Don’t store them on their side or the layers will be resting on one another under their own weight. In warm or humid conditions the layers can stick together or chemical can migrate through contact.

    But in a war zone? And what about the photographers who shot in Vietnam with sky-high humidity?

    You could put a desiccant bag with the film canisters to absorb any moisture. Desiccant bags come packaged with lots of products nowadays and maybe it’s been around for while.

    I just googled the question and small bags of desiccant, most commonly filled with silica gel, became widely available
    for commercial and consumer use during and after World War II.

    So that answers that question.

    Did war photographers have the means to develop film before they sent the rolls back to the home country?

    You might think that developing the film made it less subject to risk of being ruined. In a way it is true because the film has to be kept away from light. But once exposed it is no longer in little protective rolls and canisters. It can get scratched and attract dust.

    I wonder, did photographers roll the developed film back in the canisters?

    Even in peacetime, some photographers amass a lot of undeveloped film. Gary Winogrand would keep his exposed rolls for a couple of years before he developed them.

    It wasn’t because he was lazy. It was because he wanted to remove himself mentally from the scene he had exposed. He wanted to see the photograph as though he was looking at someone else’s photographs.

    Anyone who photographs knows what this means, that we see things in our own photographs and give them qualities that maybe aren’t there. At least, qualities that a disinterested eye doesn’t see.

    At his death Winogrand’s refrigerator contained more than 2,500 exposed but undeveloped rolls he’d shot. The Metropolitan Museum of Art in New York had a retrospective of Winogrand’s work including from some of the 2,500 rolls of film Winogrand never developed.

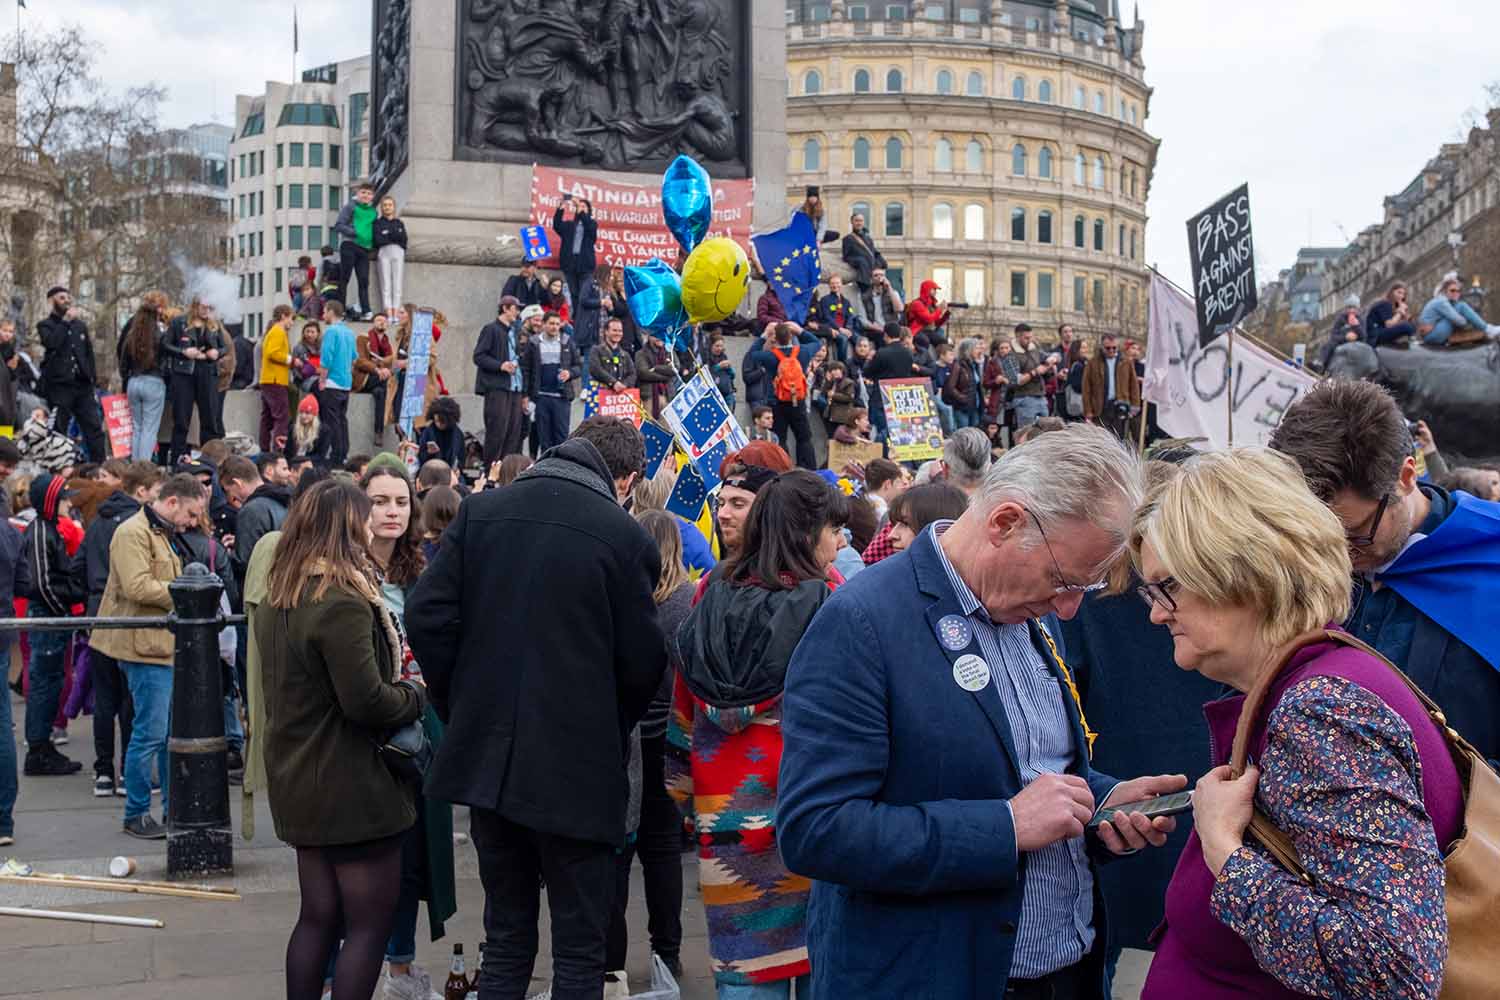
    All Photographs Become Historical Records

    The anti-Brexit march was in 2019. A huge, peaceful march in London that sits in the memory now as a meeting of people who saw what no one in Government wanted to see.

    Now nearly seven years on we read that just a week ago or so the inner circle of the Conservative Party admit that Brexit has been a disaster.

    It’s impossible to look at any event in the world and say whether it was a cause or a consequence. But looking at the world today it is not hard to say that Brexit played its part in unbalancing the world.

  • New Beginnings With A Nikon FE

    Top plate Nikon FE

    This is not the Nikon FE I bought about twenty to twenty-five years ago. I sold that and then a few years later I had a yen to have one again, so I bought this one.

    It’s a manual focus camera that uses one little Mallory cell to power the exposure meter, and the battery lasts about a year of normal shooting. To take a reading you half cock the wind-on lever and that activates the meter. Then you adjust either the aperture on the lens or the shutter speed on the dial on the top plate until the needle and your settings coincide.

    As long as you remain in similar lighting conditions you can leave that where it is once you have set it. If the lighting changes you have to reset the exposure.

    After a while you get into the habit of keeping an eye on that floating needle in the viewfinder.

    And for years I have used it in the same way to get the correct exposure, namely to line up the floating needle in the left of the viewfinder to the control needle by changing aperture or shutter speed. And I never gave a thought to the word ‘Auto’ on the shutter speed dial.

    At least I didn’t until I was watching a video about the Nikon F3, and the presenter explained its development from the Nikon F2. In the course of doing that he mentioned that the Nikon FE could operate in Aperture Priority with auto exposure by setting the shutter speed dial to Auto.

    What a revelation, because my reason for leaving the camera on the shelf is that having to do two things – focus the manual focus lens and also to get the exposure right – is one too many things to do when I want to take a shot when the scene is changing rapidly.

    The lens on the camera is a Nikon 50mm f1.8 E lens, known for rendering a dreamy or filmic image character.

    Maybe the 50mm f1.4 AIS, known for making very rounded images with depth. That thought can park itself until I use the camera and see what I think of the result with the current lens.

  • The Inverse Square Law

    The inverse square law is used when the photographer controls the light source, when he or she can control its strength and move it nearer or further from the subject.

    It is a pretty simple calculation that enables you to know how much light is going to illuminate a subject and from the subject to your camera at a given distance.

    Let’s start in a situation where you do not use the inverse square law.

    That would be where you pretty much cannot control the light, such as when you are taking photos outside in daylight.

    When the sun is in the sky and there are no clouds, then the sun is a specular light. That means it is a concentrated light source that will cause deep shadows and bright highlights.

    True, the light from the sun is all over the sky but the light source itself (the sun) is a small light bulb in the sky and all the light is travelling straight from it.

    That causes a lot of contrast with bright highlights and deep, harsh shadows when it strikes an irregular surface such as a human face, particularly older faces with cracks and crevices.

    But a bright sun also casts shadows below noses and below foreheads, and it is not the most flattering light, except perhaps for older, craggy male faces.

    It’s different when it’s cloudy.

    The light from the sun is diffused as it scatters and bounces through the clouds. The range of intensity from light to dark is less, there are fewer shadows and everything blends more evenly.

    The photo of the woman above was taken on a cloudy day, and there are no harsh shadows.

    The California Sunbounce is a giant diffuser that a photographer can put above the head of a subject. And film makers with a crew behind them can use big lights to swamp the light of the sun.

    But if you are just a photographer with a camera, there is not a lot you can do to affect the light of the sun.

    Studio Flash

    It’s different when you are taking photos indoors using a studio flash or continuous lighting.

    You will probably diffuse the light through lightbox or you will bounce it off a reflector to make a more flattering, even light.

    That’s when we need to know how to work with the light and know how to adjust it.

    When you are working with flash the only variables you control are the ISO and the aperture.

    The shutter speed is pretty irrelevant because the flash goes off at something like 1/2000th of a second. And that determines the length of time there is light on the subject.

    This is where the inverse square law comes in. The law allows you to calculate how much light falls on a subject as the light source moves nearer to or further from the subject.

    The law wasn’t dreamed up. It is not a convention. It is a law of physics derived from observations.

    Everyone knows that when you move a light source away from a target, the light falls off. And it should surprise no one that the light falls off at a predictable rate.

    The inverse square law tells you what that rate is.

    Let’s start with a light that is a distance two metres (2m) from the subject, and the subject is adequately lit.

    The only light source is the flash. Any other light source in the room will be drowned out by the flash when it goes off.

    Now you move your flash from 2m to 4m from the subject. The amount of light hitting the subject is less because the light has to cover twice the distance,

    The amount by which the light falls off is the inverse of the square of the distance.

    So to light the subject to the same amount as the subject was lit at two metres, we must square the amount of light.

    Now you want to know how to set your camera. And f-stops tell you exactly what to do.

    Suppose the correct aperture was f16 when the light source was 2m from the target.

    When the light is 4m from the target the aperture you have doubled the distance, so the light needs to be the square of doubling. That is, it needs to be four times stronger for the same amount of light to hit the target.

    How do we know what aperture is four times stronger, meaning that it takes in four times as much light – as f16?

    Well, that’s how f-stops were designed because every stop of light is a halving or doubling of the light.

    Here is a range of f-stops from smaller to larger. The list covers most lenses you are likely to come across.

    f32, 22, f16, f11, f8, f5.6, f4, f2.8, f2, f1.4, f1.0

    So to push out four times the light at 4m as at 2m, we need to square it, which means we have to double the light (one f-stop) and double it again.

    In our setup we were at f16, so we need to go 2 stops to f8.

    That’s it.

    If you move from 2m to 3m or from 6m to 9m, the math is a bit more complicated than when working with doubling or halving, but the light needs to be increased by 1.5 x 1.5 = 2.25 times and that equates to a bit over a stop – actually 1.17 f-stops.