• Composite shots with the NIKON P5100

    One of the nice things you can do with the P5100 is choose from a list of image sizes, from the largest 4000×3000 pixels down to 1 megapixel and beyond (for TV) as well as square format and 16:9 letterbox format.

    The square format appeals to me, as does the ability to put a black keyline around the shot after it has been taken. It looks very attractive.

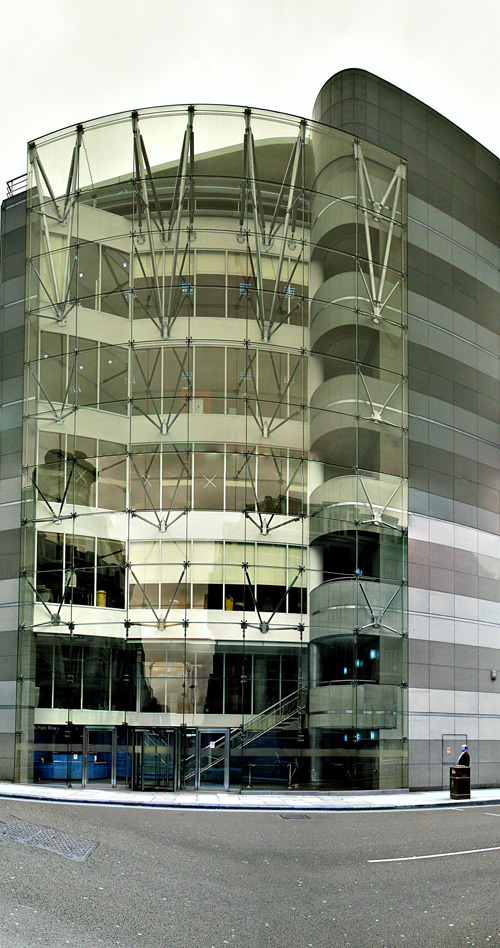
    But the appeal of smaller image sizes comes into its own with composite shots. Composite shots – called Photomerge in Photoshop, are made by taking a number of shots dotted around a large subject, making sure to cover every part of it and even beyond its boundaries, and then using the photomerge function in Photoshop (file > automate > photomerge) to merge them into one composite image.

    And therein lies the potential for a problem. Because if I take twenty shots of a building and each shot is 12 megapixels, and then ask Photoshop to merge them and blend them into one image, well that is a lot of images and a lot of processing power needed to deal with it. I have produced images with a Macbook Pro that at some stages in the photomerge process are over 1.2GB in file size.

    Hence the attraction of using 5 megapixel images to build up the picture rather than the full 12 megapixel ones.

    Photomerge is a very powerful tool that deals with differences in exposure in the shots taken around an image very well. I have tried using the Manual setting but Aperture Priority produces good results, even when some individual shots seem dark (such as is caused by strong backlighting) when seen in the LCD when taking the shot.

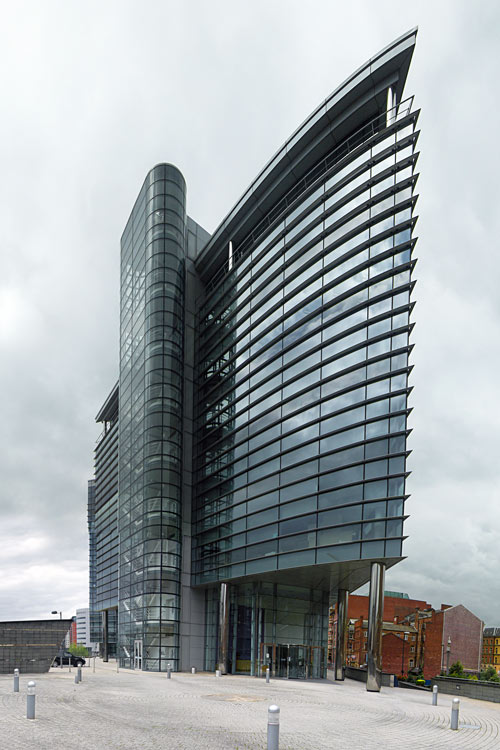
    This building is opposite the railway station in Leeds, England and it extracts lots of drama out of a setting that is not that auspicious.


  • Auto Color in Photoshop CS3

    If you haven’t clicked on Auto levels or Auto Color in Photoshop CS3 when you are processing images then I recommend you do.

    When I am processing shots in Photoshop CS3 I often click on Auto Levels or Auto Color (Image > Adjust > Auto Color) to see that the effect is, and quite often I’m surprised at the result Auto Color produces.

    It’s not a question of whether I like the result but rather, than I am surprised at what a powerful tool it is. It reminds me of the color recovery capabilities in scanning old, faded color photographs. The results are often nothing short of amazing.

    I clicked on Auto Color when I was processing this shot, but it took all the yellow out of the background I had carefully put in, and whilst it opened up the shot, it was not what I was looking for. This shot of irises is pasted over a shot of a sheet of art paper I had soaked in coffee and let dry.

    I am building up a small collections of backgrounds over which to lay photographs.

    Irises

  • Nikon D200 and 60mm AF-S f/2.8 compatibility

    I have been using this Nikon lens (AFS Micro-Nikkor 60 mm f/2.8 ED to give it its full name) for a couple of months and overall I am very pleased with its build quality, its sharpness and the ease with which it can be focused manually. What is not so wonderful is its autofocus capabilities.

    For most subjects it jumps into focus as quickly as one would want and expect from as AF-S lens, but in many quite ordinary focusing situations it winds in and out, hunting for focus. It is worse at short camera to subject distances but there are times when it will hunt a little at almost any distance.

    I have changed the focusing set up to group dynamic-AF and in Custom Settings I have (a)4 set at ‘Closest Subject’. It may have improved things – I think it has.

    I have heard the problem exists with the D300 as well as with the D200, but I only have experience of the latter.

    That is not to say that it is terrible, but I wouldn’t use this lens as a street lens, when I wanted fast focus. On the other hand its macro capability is as good as claimed by its specifications, and I am very glad to have it.