What’s the difference between file size and pixel size or number?
Disclaimer
I hope I don’t mess this up and make the answer so complicated that it leaves you, the reader, even more in the dark than before you attempted to wade through this. That said, here goes:
When you take a photo with your camera, the pixel size will depend on the specification of the camera. So, for example, my Fuji camera has 16 megapixels and the dimensions of the photo are 4896 x 3264 pixels.
If you multiply those two numbers you will see it comes to about 16 million.
A Diversion
I have to make a small diversion here to explain what those 16 million pixels are.
Those pixels are captured by 16 million micro-lenses laid out in a grid. That’s 16 million tiny lenses stuck onto a piece of material not much bigger than a thumb nail – which is more or less what a camera sensor is.
OK, diversion over, and back to the question.
If I were to take that 4896 x 3264 pixels image to a camera shop and ask them to print it full size, they would print it at 300 dots per inch.
Each dot is a squirt of ink that the printer sprays onto the paper.
There’s a reason for it being that number of dots per inch.
The reason is that when viewed from a ‘normal viewing distance’, the image will look ‘continuous’ to the human eye.
At 300 dots to the inch, my photo will print at 4896/300 x 3264/300 inches. That’s about 16 inches by 11 inches.
And you can imagine the kind of viewing distance at which someone might look at a photo that is 16 inches by 11 inches.
Let’s say, though, that I knew that the viewers would be standing much further back. Then the printer could get away with printing at, say, 150 dots per inch.
Next time you are near a bus, take a look at the advertisement that’s plastered on the side of it.
When you are close up. you can see the individual dots. But from further away, your eye and brain sees one continuous image.
The bottom line is that the size of the image that is printed depends on the density of the dots that are squirted onto the paper. The more spaces between the dots, the bigger we can print the image.
The more space there is between the dots, the less ‘clean’ and dense the image will look when viewed close up.
Computer Screens Are Different
Computer screens are quite different. Each model has its own native resolution or pixel density.
72 dots per inch is usually taken as a good standard.
And here is the crucial difference. Unlike with printing onto paper, you can’t cram more pixels onto the screen. The screen manufacturer might be able to when they build the screen, but you can’t.
The screen is built to a specification and you can’t make the pixel density higher.
You can’t cram in extra pixels and make the image look denser.
That means any ‘extra’ pixels are wasted.
And each unneeded, extra pixel increases file size.
WordPress
The question about file size and pixel size was asked in the context of uploading images to a WordPress site.
And one of the things you will know if you have a WordPress site is that you can specify the dimensions at which you want images to show.
Let’s say the media settings in the Admin panel in a typical WordPress site specify a pixel size of 600 pixels wide.
Uploading a full-size image of 4896 x 3264 pixels would not produce a ‘better looking’ image on the page because the extra pixels would not show.
And there would be a detrimental effect on the speed at which the site can load the images. I discussed this in my last post.
Instead, what you want to do is to create a small version of the original file at around 600 pixels and 72 px per inch and upload that.
The Wonder Of JPEGs
Now we get to the other component of file size, which is the wonder of JPEGs.
The beauty and the point of JPEGs is that they can pack an image into a small file size.
They do this by recognising similar nearby colours and mapping them. Then they pack themselves up, including the intructions for how to unwrap the colours. When the JPEG is opened to display it on a screen, the formula unpacks itself and displays the image.
It’s amazing, isn’t it, to think of a JPEG packed away in a tiny file on the WordPress servers, waiting to be asked to unpack itself so that you can view it on the screen – and doing that time and time again, on demand.
Saving JPEGs
There are many different tools or applications for creating JPEGs.
The feature they generally share is that they allow you to save different quality JPEGs.
What that means is that the mapping instructions can work on an individual pixel level or on larger blocks of similar coloured pixels.
The finer that mapping, the bigger the file size. If you are going to get your photo printed on paper and the printer wants a JPEG, then you would give him/her a top-quality JPEG – one that you saved at 100%.
The file size would be big – but it doesn’t matter, and you want the best quality printed image possible.
The unconverted 4896 x 3264 pixels files from my Fuji are about 30 megabytes. If I make a full-size JPEG at highest quality from one of them, it will probably come in at around 10MB.
But on a computer, you can get away with a lower quality (smaller file size) and the viewer will not be able to see the difference on the screen.
Not All Images Are The Same
Think of a photo of a red beach ball: The JPEG application will find lots of similar neighbouring red pixels, so it will be able to make a very small file.
Now think of a complex nature scene: With the many complex hues of nature, the JPEG algorithm will have fewer neighbouring colours to work with, so the resulting file will be larger.
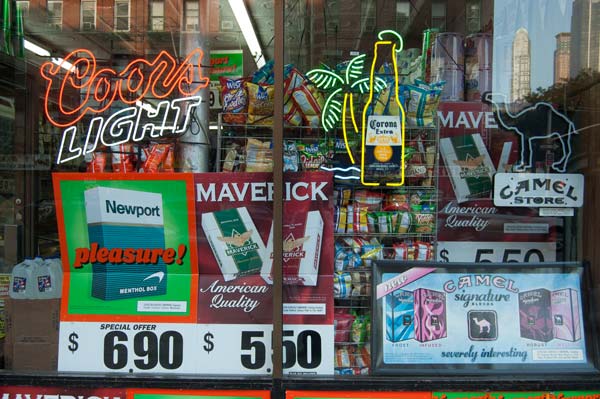
Here are a couple of examples of what I mean. The first photo is complex. In order to get it to look ‘clean’, I had to save it at 45% quality. At 600px wide, the file is 61KB.
I saved the second version of the photo at the lowest setting. It is still 25KB and you can see a lot of pixelation.


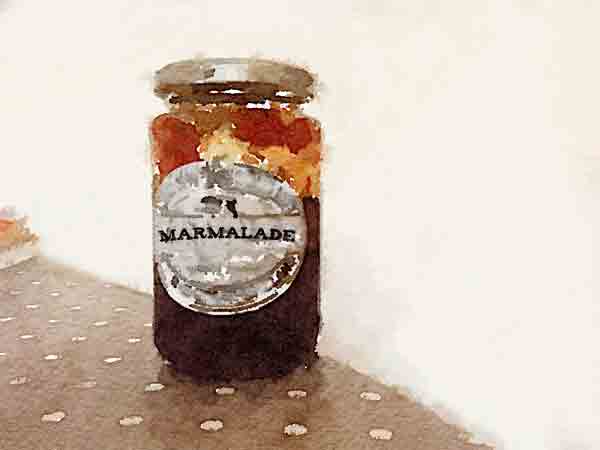
With this second image, it’s a different story. Saved at 45%, the file size is 25KB. I saved the second version at the lowest quality setting. It is 12KB – and even at this lowest setting the second version is not obviously worse than the higher-quality version.


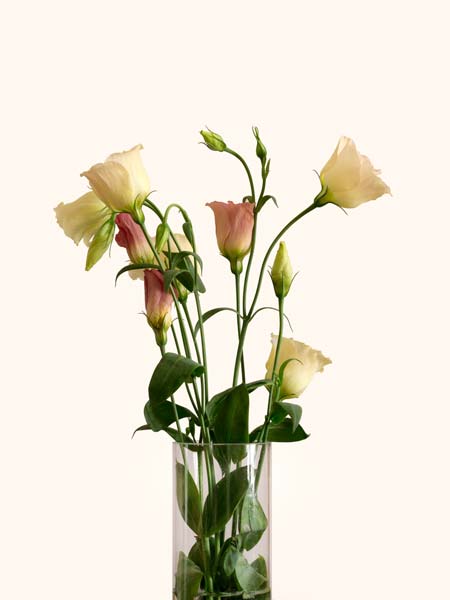
And here is a kind of ‘in between’ image. It is complex, but a lot of the image is taken up with the solid colour background. Saved at 40%, the file size is just 20KB. With the second version – saved at minimum quality – the file size is 12KB and the flowers look pixelated.


In order to show you how badly pixelated the ‘one percent’ version is, here is a blow up of part of the image.

In other words, if you want a clean-looking image, then you have to take into account what kind of image it is. More complex images ‘demand’ that you save at greater quality, which means a greater file size.
But before you think about what quality of JPEG, make sure you save at the pixel dimensions that suit the purpose – and for the web that is usually not more that about 600px wide.
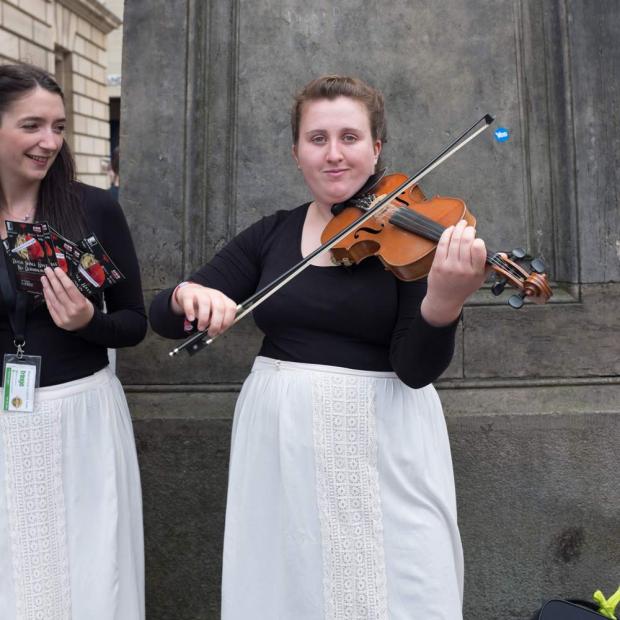
Of course, there may be times when you want your viewers to click the image to see a bigger version – and it that’s the case, then save at a bigger pixel size, like I have done in the following image, which is 115KB.
I took the photo in Edinburgh during the Fringe Festival this summer.
Can you see the ‘Yes’ sticker on the monument behind the violinist? That was a campaign sticker promoting independence for Scotland in the referendum held in September this year.
Click the image to see a larger version.
What About Phones
Finally, when saving an image taken on your phone, you may or may not have an option to save at different qualities.
It was the desire to have control over the quality and size of JPEGs for the Web that drove me to find a good image re-sizer for my iPhone, which you can read about in my last post.

Hi David, A very helpful post – I was completely confused about all this. Not anymore. You’ve made it easy for novices like me to understand. The examples helped heaps!
LikeLike
Great!
🙂
LikeLiked by 1 person
Made perfect sense, and easy to understand. I’m a lot more knowledgeable now than I was a few minutes ago 🙂
LikeLike
Thank you 🙂
LikeLike
Very helpful and easy to understand post. I’ve always just used urls from my smugmug galleries, because it’s much easier to upload on time full size to SM, since I travel so much, and internet is not good. But I always have full size backups of my photos that way, in case something happens to my computer. But lately I’ve discovered the gallery post format, and really like using it at times on one blog, and on my butterfly blog, I have to use a small featured photo on the main page. So this is really helpful for me to understand better what I need to be doing. Thanks.
LikeLike
Your explanation was easy to understand on a subject that has always confused me. Thank you!
LikeLike
Thanks – the part about jpegs was especially fascinating! Very helpful.
LikeLike
David this explains what happened with the photo I experimented with after your last post. The image was very detailed and when I reduced the size to 25KB it was so pixelated it was unrecognisable. Now I understand why. This information is so helpful and I’m gradually gaining a better understanding of what to do with the images I post. Thank you.
LikeLike
Well, I’m a little bit wiser, but still not sure what to do with it, David. Thank you for your efforts. 🙂
LikeLike
A good start is not to upload huge images.
LikeLike